Tuesday 13 December 2011

Spoon carvers Khomus harp...

Well...
There it is...
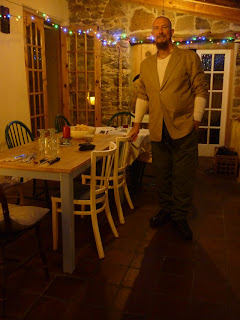
I've reached the grand old age of 50.
Really not so bad as I've found out.
Sarah and I gave a small bash here at home where my oldest and closest friends joined together and ate a splendid lamb Balti, cooked by Richard and Tas.

jon mac spoon carving first steps

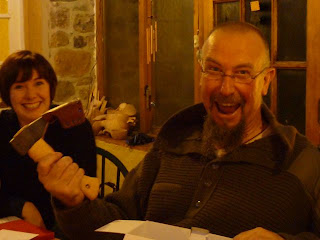
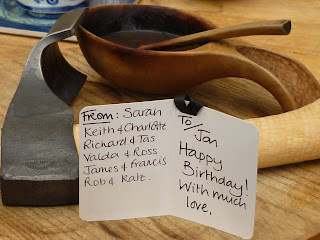
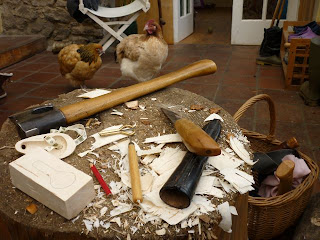
My good friends and family all chipped in and bought me a new edge tool.
An Adze from G.Bruks.
Sweden.

jon mac spoon carving first steps

Now I can hollow out my larger bowls and Ale hens a little quicker than when using the hook knife.

spoon carving first steps

Thank you all so much....

Sarah had been busy with other secrets as well.
She had spent the summer trawling around trying to find a Khomus mouth harp.
She finally tracked one down at Hobgoblin London.
It was a complete surprise when I opened the small parcel on the morning of my birthday.

khomus jews harp spoon carving first steps

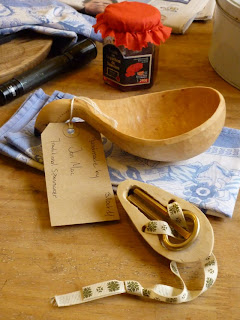
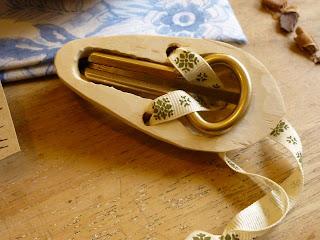
This delicate instrument came without a case.
So I decided to make one for it as soon as I could...

khomus kuksa spoon carving first steps

Well... It did the job...

khomus jews harp spoon carving first steps

But Dolly and Choti thought I could make a better one.

spoon carving first steps

So I squared of another piece of Birch with my Axe and started afresh.
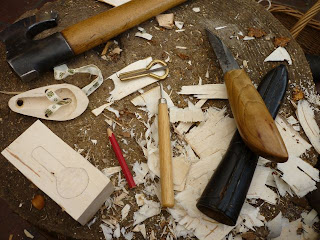
The first one was made with a knife and hook knife to start with... I'm afraid to say that because of the small size of the box I decided that I would have to employ another small tool.

spoon carving first steps

A tiny relief carvers gauge.
You can make it out in the centre of the picture.
As you know, I usually limit myself to three simple tools.
Axe, Knife and hook knife.
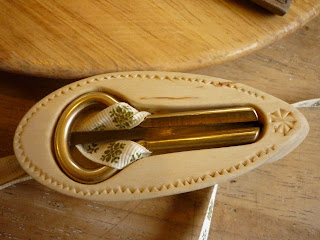
But on this occasion I had no choice as the dimensions of the box were dictated by the dimensions of the Khomus.

spoon carving first steps

Well here it is...

khomus jews harp spoon carving first steps

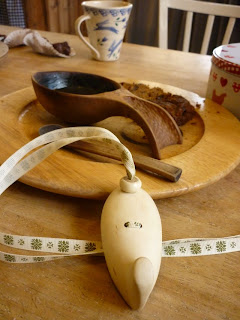
I can pop the cord around my neck and wear it as a pendant for safe keeping.
It has a camel bone bead on the back to keep the cord tight.

khomus jews harp spoon carving first steps

And I managed to hide the cord holes underneath the harp...

khomus jews harp spoon carving first steps

Here is a movie of me playing my super Khomus harp


I have played a mouth harp for about forty years.
But not one of such quality.
I will keep practising.
And enjoy the unique sound that these instruments produce.
Happy days.

Enjoy...

J


Wednesday 16 November 2011

Tracking with Mark Lane...


 Tracking with Mark.

http://wildernessguide.wordpress.com

 My good friend Mark Lane sent me an e mail the other day. He suggested I get up at a good hour on Saturday morning so he could pick me up and take me to a near-by forest for some tracking and stalking tuition.
Back in the day I was quite used to being woken in the middle of the night by the sharp shrill alarm of the telephone...Someone the other end of the line would give me a grid reference and a quick over view of the call out we were about to under take. With these messages came a large dollop of adrenalin that would coax you through the first stages of readying your tea/coffee and rations for a long nights search, dressing, grabbing your Bergen pack and then the drive through what was usually dreadful weather to the R.V. The adrenalin would usually last until your team had been briefed, supplied with various specialist equipment and finally deployed.
Well....

None of that happened on this morning. 
I awoke and made a good strong pot of coffee to have with some Irish boiled fruit cake as is my habit of a morning.
Mark arrived promptly and off we went.

We had a good old blurry first thing in the morning chat as we made our way to the forest on the other side of the valley. 
Mark provides tracking and wilderness skills training for 'Devon Discovery'. He is an associate at Embercombe and runs his own, very well crafted, skills training from a forest location in the Teign valley.

We arrived at the forest and sorted out our kit for the day. (I found that my small Platypus water bladder had sprung a leak, won't be relying on that type of water carrier again. Back to a proper metal bottle for me.) The sun had yet to rise and all was quiet. As we put on various coats and Bergen's Mark made an off the cuff comment that there was a possibility that someone would soon pass us and enquire as to our business.
Well that person soon arrived in the shape of the local game keeper.
We had a chat with him and set off for the forest clearing where Mark would run me through some zoning in exercises...
We arrived at about 6am, dark and warm.

spoon carving first steps

Mark asked me to find a nice comfy spot where I could quietly sit and 'Zone In'...
The forest was peaceful and quiet except for the occasional call of a distant owl and the bark of a local Fallow deer. I let my mind drift into the forest.

spoon carving first steps

As the light came up there was a sudden explosion of barking and screeching... A squirrel's drey had disgorged it's squabbling contents into the day. A few seconds later I heard that distinct whirring sound, as if a round you had sent up range had deflected, and was now heading back down range...I was crouching in the leaf-mould........ I tensed and made myself small as I knew something bad was about to happen....And a crunch ! as a large branch landed close beside me. It had fallen from way up in the canopy of the Scots pine I was beneath. Mmmm ! That's lucky I thought, as Mark appeared out of the morning light. 

mark lane (http://wildernessguide.wordpress.com)

Mark briefed me as to what we were going to achieve during the day. The first thing he did was to run out about 100 metres of fine cord, at about shoulder height, through and around the trees with twists and turns. I was blindfolded and lead to the start point of the course. Mark had explained that this was a 'Sensory/Physical awareness exercise.
By denying visual senses you force your other senses to work harder – hearing, smell, touch. It improves foot placement and balance. It slows you down and helps you understand muscle control and balance.
I set off, placing my feet purposefully so I could understand the nature of the obstacles before me.
As I moved carefully along I began to think of my whole body balance, my breathing became heavier as I tensed-up. Didn't expect that to happen. My thoughts turned to my feet, knees and hips. A life time of lifting, carrying and working in the out doors has taken it's toll on these joints, because I had to test each step these places where put under abnormal stress. I stopped.... I realised that my internal dialogue was becoming so loud  I could no longer hear the call of the wild going on all around me, the morning watery bird song and the tap of a wood pecker. I started off again. This time ignoring my internal and concentrating on the external.
Soon enough I had reached the end of the string maze.
This little exercise had highlighted the way I move through the forest and my interaction within it. I used to rely on my inner calm and awareness arriving unheralded on my walks. I may now be able to get into the flow of things quicker than in the past.

spoon carving first steps

The next exercise...

Stalking / moving quietly - focussed on breathing, vision (peripheral vision, ground mapping), balance (engaging core muscles and lowering centre of gravity), foot placement.
Now I had tuned in my balance Mark explained how it is beneficial to be able to quickly map the terrain you need to move over, keeping your vision busy looking for Shape, Shine, Shadow, Silhouette, Movement and your ears busy listening for Sound - rather than spending  time looking at the ground.
As a retired Search and Rescue team member I know how difficult this can be. But once we had slowed things down it became comfortable.

After a brief chat Mark decided we could move into the close cover of the forest and try out my new skills.
One of the first things we found was a bird 'kill site'.
We stopped to investigate and decided that the blackbird was probably taken by a Sparrow hawk. We looked closely at the feather Calamas, the hollow shaft that grows from the bird. Mostly the Calamas was crushed suggesting a raptor, although some were chewed signalling the presence of Mr Rat who probably visited after the Sparrow hawk had finished its' meal.

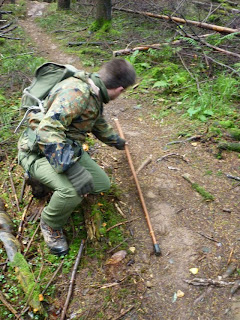
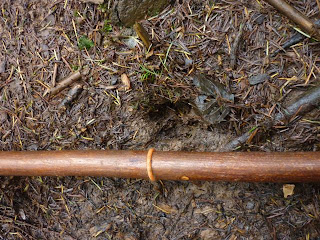
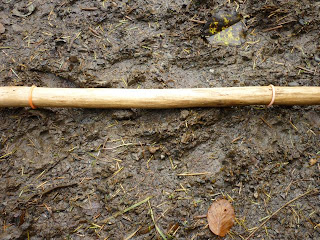
Mark then found some fresh Fallow deer tracks. He showed me a super trick using two rubber bands to measure stride length and to help identify where the next track was. I popped the two bands on my walking stick and Mark showed me how to use this useful tool.
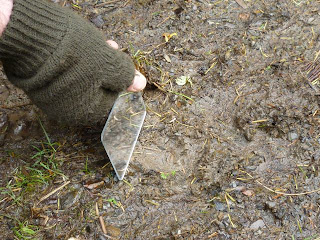
You can just make out the bands on Mark's stick as he searches for a missing print.

mark lane (http://wildernessguide.wordpress.com)

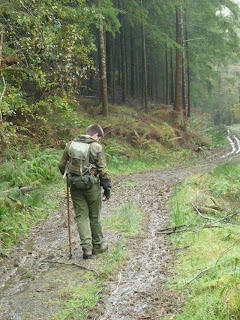
We also talked briefly about using 'baseline' behaviour of an animal to identify its direction and rhythm. We moved quickly to get closer to the animal, we took care to allow for changes in baseline behaviour, the animal moving off the trail. In this case we found a 'lay-up' but the deer heard us and moved on. We could see the fresh prints and then they stopped. They must have moved off the track. We used the stick trick to find which direction they had moved in. Had they turned left and jumped the stream ? Whilst Mark cast about for the next print I looked at the puddles further along the track. The water was clear so they had not passed that way. Mark found prints near the stream, they had crossed.

http://wildernessguide.wordpress.com

 One of the bands and a deer print is seen directly above...

mark lane (http://wildernessguide.wordpress.com)

Well we lost contact with that group.
As time was running on we wanted to get to another part of the forest. Here Mark has access to some super woodland where he runs his courses.

We carried on searching for tracks and sign and experimenting with the measuring trick.
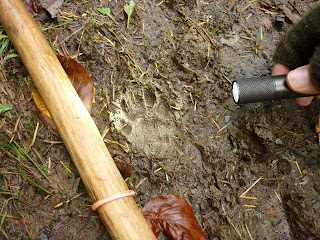
 A set of badger tracks seen just below the rubber bands...

http://wildernessguide.wordpress.com

...shows how a light source can highlight up fine detail.

http://wildernessguide.wordpress.com

You can also use a mirror, although there was not much light to talk about at this stage of the day.

http://wildernessguide.wordpress.com

We found some more sign.
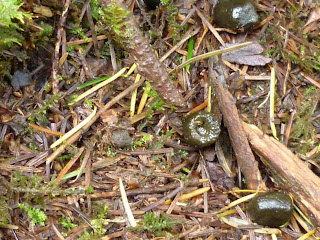
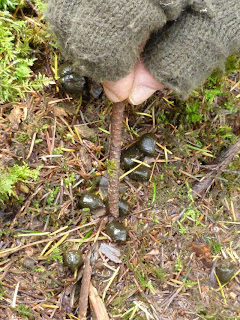
Fresh shiny deer droppings with the distinctive bottle shape and dimple.

http://wildernessguide.wordpress.com


http://wildernessguide.wordpress.com

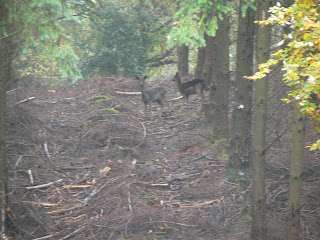
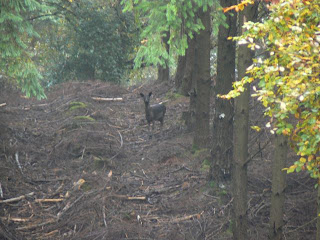
And after a little more work we finally managed to photograph our friends the deer...

http://wildernessguide.wordpress.com


http://wildernessguide.wordpress.com

We were now close to a place where we could light a fire and settle down to some lunch.
Mark picked up some Birch bark and we collected some twigs from nearby pine trees.
Every thing was damp after the rains we have had, and boy, has it rained.
I usually carry a tiny stick of resinous pine root that I was given the last time I was up in Scotland with Chris Grant. If you fluff it up using the spine of your knife you will make tinder that will ignite quickly once a spark has been introduced.


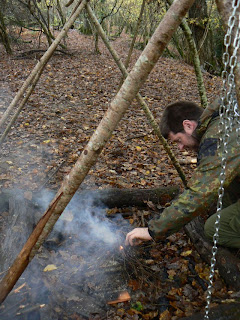
With our sticks and tinder Mark managed to make fire, good going considering the dampness of all our makings...

mark lane (http://wildernessguide.wordpress.com)

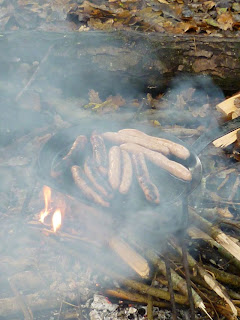
Once the fire was going Mark cooked us some wonderful sausages...

mark lane (http://wildernessguide.wordpress.com)

What a great way to finish the course.

http://wildernessguide.wordpress.com

We sat and ate together and discussed the mornings work.
Now I have been given the skills to vocalise what comes naturally when I am out and about, I believe I can hone my natural skills and become a more accomplished stalker/searcher. Mark has given me the tools to understand my journey through the forest in a different light.

mark lane (http://wildernessguide.wordpress.com)

I can't tell you how much I enjoyed my time with Mark and I would highly recommend you spend some of your time with this remarkable chap...
Wilderness Guide.

Enjoy...J


Tuesday 8 November 2011

A spoon carving Victory...


HMS VICTORY 
 The only surviving warship that fought in the American War of Independence, the French Revolutionary War and the Napoleonic wars.
This 100 gun man'o'war was laid down at Chatham docks in the year 1759. She was completed in the year 1765 and after sea trials she was put on the 'ordinary' list of reserves. In 1778 she was commissioned into the line as Admiral Keppel's flag ship when France joined the American War of Independence.

This mighty Oak warship won many battle honours during her service, perhaps the most famous for the people of Britain was her victory over the combined Franco/Spanish fleet off Cape Trafalgar in 1805.
 
She was by that time the flagship of Admiral Lord Nelson. Her captain at Trafalgar was Thomas Masterman Hardy.

Her crew of 820 hailed from the British isles (700) and (120) from 18 other nationalities including Americans.
At daybreak on Monday the 21st October 1805 Nelson's fleet of 27 engaged the larger Franco/Spanish fleet of 33. A great sea battle ensued.

At about 13:30 the enemy were routed...
17 enemy ships had been captured.
 Admiral Nelson had been killed by a French marksman shooting from the fighting tops. 
There was much loss of life and bloodshed. 

But the threat to Britain had been removed.

Nelson's body was bought back to England pickled in a barrel of Rum.

Over night he became a national hero...

Time passes and old enemies become great friends.

H.M.S Victory now rests in dry dock at   
No2 Dry Dock Portsmouth's Royal Naval Dockyard. 
She has, over the years, been restored to her former glory and work still goes on keeping her ship shape.

My old friend and master spoonmaker Ralph Hentall gifted me a couple of pieces of the old Victory. He is often given pieces of wood that have historical bearing with which he carves commemorative spoons. These are often sold with the correct letters of proof, and the money raised goes toward further restoration of the specific project.

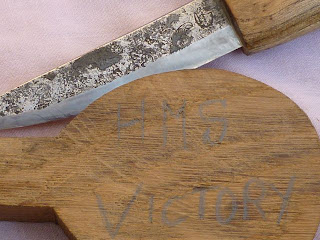
Well, this piece has been sitting at home with me for some time now. I finally decided that I should make a basic, simple spoon from the piece; a spoon that a matlo serving aboard Victory might have carved with his knife.

spoon carving machris knife spoon carving first steps

As you can see, the spoon blank was already cut out by band saw so there was limited room for manoeuvre.
spoon carving machris knife spoon carving first steps
 I recently saw a film that included some footage of Russian folk eating from large bowled spoons, much like metal soup spoons of today. I decided that given the food aboard a ship 'o' the line back in Nelson's day would have been quite basic, I would carve a spoon to suit.
spoon carving first steps
I perched 'Choti' on my carving stump so I could keep an eye on her, she is getting stronger by the day but still needs supervision.
spoon carving machris knife spoon carving first steps
The handle ended up with an octagonal profile...
spoon carving machris knife spoon carving first steps

The Oak is old and hard and although my knives were super sharp and kept a good edge I had to polish them from time to time on my King water stone.

spoon carving machris knife spoon carving first steps

The finished spoon...

spoon carving machris knife spoon carving first steps

No decoration save for a single 'V'...

spoon carving machris knife spoon carving first steps


spoon carving machris knife spoon carving first steps

More information about the on going restoration of this magnificent ship can be found at...
H.M.S Victory

Oh ! And by the way. Remember I mentioned that Nelson's body was pickled in Rum for the return journey ?
Well, folk lore has it that the sailors aboard Victory drilled a tiny hole in the great barrel containing his body.
They used straws to sip the Rum from the barrel.
Once home the barrel was found to be empty of Rum and only containing the body of Nelson.
So next time you take a tot of Rum for free you will be
'Tapping the Admiral'...
A phrase still in use here in the West Country...

Enjoy...J


Wednesday 12 October 2011

Where spoon carving and chickens colide...


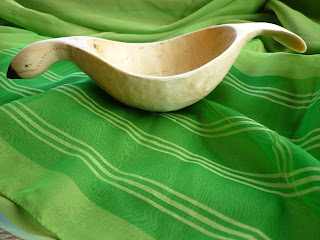
kuksa spoon carving spoon carving first steps

 Sarah is having one of those birthday things. I panic at this time of year because I still haven't managed to save enough to buy her a Roller. 
Instead I will cook her a splendid meal and present her with some smaller gifts.
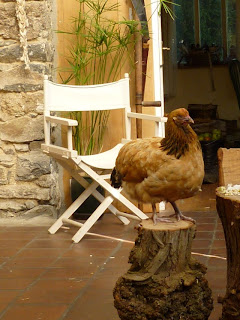
A friend made a visit the other week, he came with a small chicken under his arm. 

spoon carving first steps

 He told me the chicken had been picked on by the White Sussex that make up the majority of the flock. This can happen sometimes and the only thing to do is remove the bullied chicken.
I agreed to take her in and spent the next day observing her as I worked on one of Sarah's presents. Her crop was full and fit to burst, but her droppings were peculiar as they consisted mainly of grass. I came to the conclusion that the other birds had kept her from the chicken feed and she was crop bound with grass. This is dangerous, if nothing is done she will starve.
I set about syringing Olive oil down her throat and massaging her crop in the hopes I could loosen things up. I fed her Honey water for her strength. 
Well, over the next two days she got weaker and weaker until I thought she would shed her mortal coil and go meet the choir invisible. I resorted to an old wives tale and gave her a tiny amount of Eau de vie....Kill or cure.
 
spoon carving first steps

 The morning arrived and she was up and about. We were so pleased.
Well, I set to feeding her baby food via a syringe, she seemed to like this as she would open her beak ready for the orange coloured mush.
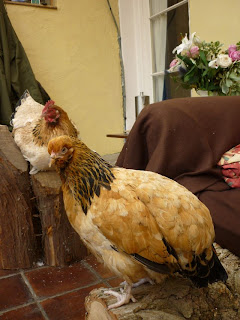
After a lot of care she is now getting her strength back and follows me around the ground floor making chickeny noises.
After consulting one of our good friends who lives in the smoke up country, we decided to call her...
'Choti Bop Bop'
Choti is 'Urdu' for little, and the Bop Bop I added as that is her call...

spoon carving first steps

She is still quite weak but I'm sure she will make a good recovery.
She has been watching as I make a special present for my Sarah...

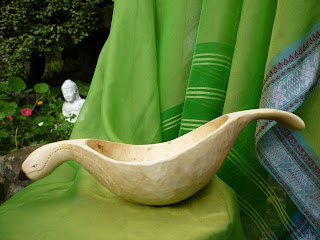
kuksa spoon carving spoon carving first steps

  I think she will love it...

kuksa spoon carving spoon carving first steps

I may not need to buy a Roller after all...

kuksa spoon carving spoon carving first steps

I guess the simple things are the most beautiful...

Enjoy...J;-)


Monday 26 September 2011

Autumn foraging and Gateau Aux Marrons...


spoon carving first steps

Autumn has arrived up here in the hills. 
The weather has been a mixture of wet and warm days with chilly nights....

spoon carving first steps

 Autumn smells purvey the forest...

spoon carving first steps

The last of the summer sun glints through the turning leaves...

spoon carving first steps

In between carving and looking after our chickens I have spent some time foraging about for some Autumn treats...

spoon carving first steps

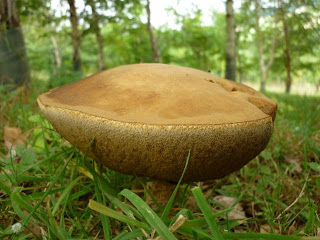
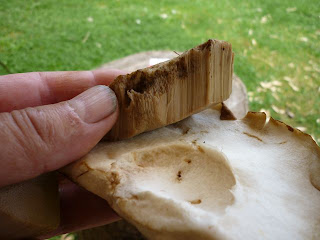
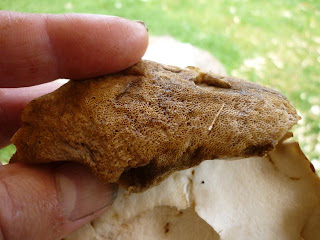
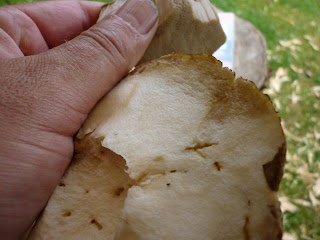
I have found quite a few Leccinum scabrum (Birch Bolete).
These are processed by carefully removing the pores from the upper flesh...

spoon carving first steps


spoon carving first steps

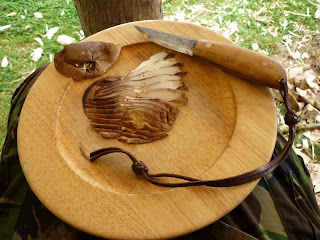
Leaving the edible flesh ready for cooking or drying...

spoon carving first steps

Slice the caps into slim strips with a sharp knife...

spoon carving first steps

I personally dry these morsels on kitchen paper left on a light windowsill. But I have been told by an old friend of mine that threading them onto a length of cotton and hanging over a heat source, a Rayburn for instance, is the way to go...
The Birch Bolete and other types of Bolete are a nice addition to any stew or soup.
But it is not my favourite.
Some years ago my French friend 'Alain' took me mushrooming up in the hills above his cob cottage in the South of France. He introduced me to, in my opinion, the most wonderful mushroom....
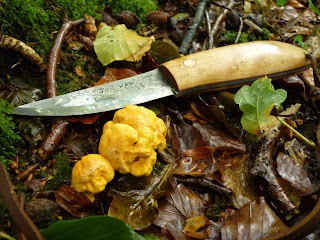
(Cantharellus cibarius.)
CHANTERELLE....

spoon carving first steps

These butter yellow mushrooms are delicious.
I remember a long hard ride on my old sidecar from the French Alps to Alan's home in the southern part of France. I arrived at his home and was given a super warm welcome from both Nathalie and Alain.
They sat me down at the ancient table in their living room and fed me a meal fit for the most weary traveller.
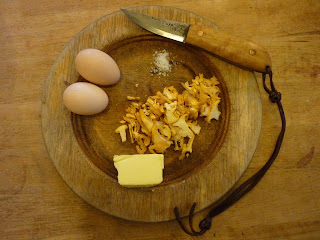
These simple ingredients will delight the taste buds.
Chanterelle.
Fresh eggs.
Butter.
Salt.

spoon carving first steps

Heat the butter in a pan and add the Chanterelle and salt, gently fry, add eggs and whisk.
Serve with bread and wine...


An absolutely delicious meal...
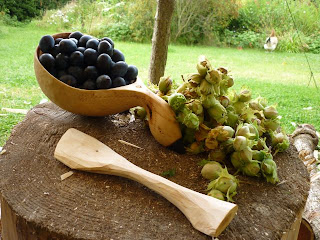
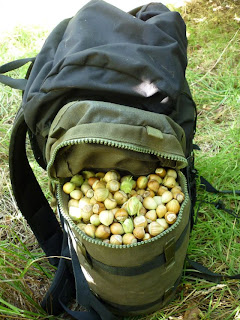
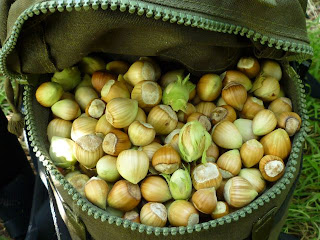
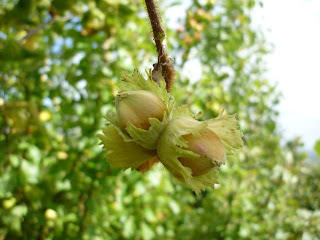
I've also managed to collect a quantity of Cob nuts and plums...

spoon carving first steps

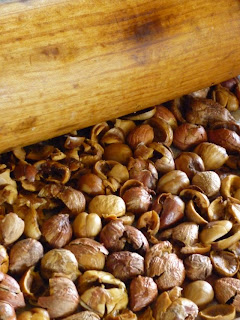
The Cob nuts need releasing from their shell. A tap with the poll of your Axe or a baton will crack the hard shell open...

spoon carving first steps

Once you have them released from their shells they are ready to eat...

spoon carving first steps


spoon carving first steps

I like to roast mine...Remove the shells and pop them in an oven at about 150 degrees for a couple of hours. This should dry them and make them a little crunchy, also improving the flavour...
Sarah and I have a super recipe in which we use roasted Cob nuts...

GATEAU AU MARRON...


For this recipe you will need...
Roasted Hazelnuts....
8oz (225 g) Plain chocolate, chopped.
8oz (225 g) Butter, softened.
8oz (225 g) Unsweetened Chestnut purée.
8oz (225 g) Caster sugar.
1-2 Tablespoons Rum/Cognac.
To Decorate- grated chocolate, or cocoa powder and icing sugar...

Rub the roasted Cob nuts together to release the papery skins. Winnow out the skins by blowing over the tray.
(Outdoors is best)


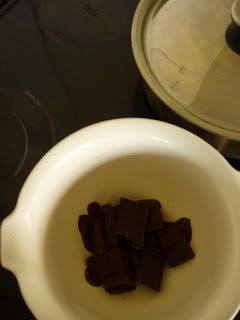
Place the chocolate in a bowl over a saucepan of hot, not boiling, water and leave until the chocolate starts to melt. Stir the chocolate until it is smooth, then remove from the heat...

spoon carving first steps

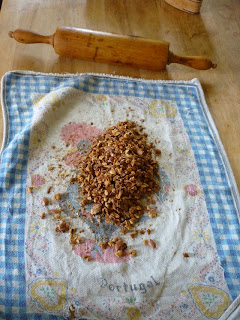
Crush the Cob nuts...


spoon carving first steps


spoon carving first steps

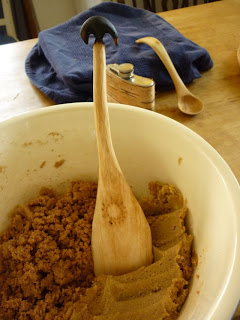
In another bowl, beat together all the remaining ingredients, except the grated chocolate or cocoa powder and icing sugar...

spoon carving first steps

Stir in the chocolate...


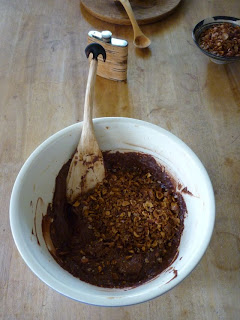
Add the roasted and crushed Cob nuts...

spoon carving first steps

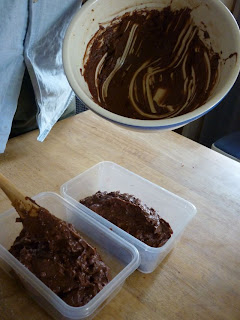
then spoon into a loaf tin or ring mould...

spoon carving first steps

Cover and leave in the refrigerator over night....
To Serve.
Dip the tin or mould briefly in hot water, place a plate over the tin or mould then, holding the tin or mould and the plate firmly together, turn them over and give a sharp shake. Lift the tin or mould away.
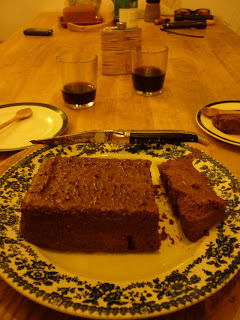
Sprinkle grated chocolate or cocoa powder and icing sugar over the top and serve sliced.

spoon carving first steps

ENJOY...J
We know you will...J;-)

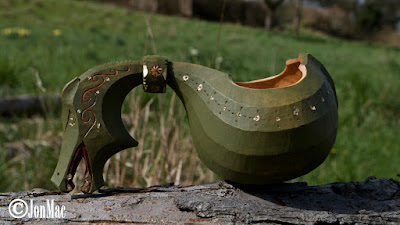
Carving a Dragon Kuksa.

Carving a Dragon Kuksa.  I have been carving Kuksa from green Birch for 15 years or so, I’m self taught. From the beginning, I limited mysel...