Friday, 13 August 2010

Friction Firelighting...

I have had a spate of enquiries for friction fire lighting courses recently, perhaps people are preparing for the cooler months. You need very little to make fire:- dry sticks, cord and a sharp edge tool. The edge tool need not be anything more than a piece of flint or glass. The cord can be a boot lace or perhaps hand made nettle cordage. The type of wood needed is commonly found in the hedgerow:-  Hazel, Birch, Sycamore, Maple and Willow to name a few. These trees are common here, there are others you can use...

spoon carving first steps

You will need to make a kit up like this either from wood you have seasoned yourself, dead standing or hanging dry wood you might see in the forest...


On the left of the picture is the drill, to the right of that is the bearing block, then above that is a small sliver of wood to catch the ember, then the bow and finally the hearth. It is best if the hearth and drill are made from the same wood, preferably the same branch. The bearing block can be made from any good tough hard wood, this one is made from Oak...

spoon carving first steps

One end of the drill needs to be carved almost flat to increase friction...

spoon carving first steps

The other end pointed to decrease friction...

spoon carving first steps 

The length of the drill is about a hand span or longer, as I have quite large hands...

spoon carving first steps

And the width of the drill is about the same as your thumb...

spoon carving first steps

Your hearth needs to be about as deep as your little finger...

spoon carving first steps

And you will need to carve a depression in it to accommodate the drill...

spoon carving first steps


spoon carving first steps

You will need to condition the hearth by drilling into the depression you made and seating the drill...
 This is the way to lace up the bow and drill... with the drill situated on the outer side of the cord...

spoon carving first steps

Put a little green matter into the hole in the bearing block to act as a lubricant...

spoon carving first steps

Take this upright stance, bracing your left hand, holding the bearing block, against your right shin...

spoon carving first steps

And apply downward pressure whilst bowing with your right hand fore and aft Before long the drill will smoke and sit snugly into the depression, it will look like this...

spoon carving first steps

Next carefully chop an eighth slot into the depression, this is important as it is the device that catches and gathers up all the fine hot coal you will shortly produce...

spoon carving first steps

Pop the little ember catcher under the hearth, load up the bow, and carefully, and without wobbling or squeaking, bow. After some time the hearth will produce smoke that will eventually thicken. Carry on for a few more bows and stop. Carefully remove the drill and let the coal coalesce...

spoon carving first steps

No need to rush at this or any moment, catch your breath, with a small piece of dry twig, restrain the coal and roll the hearth away...


The coal...

spoon carving first steps


spoon carving first steps


spoon carving first steps

As you can see here, my clients had previously prepared a bundle of dry grass and Birch bark to receive the precious coal...

spoon carving first steps

Placing the coal into the bundle and gently blowing and encouraging fire...

spoon carving first steps

A little more encouragement...

spoon carving first steps

SUCCESS...!

spoon carving first steps

They had a splendid time with tea and home made cake supplied by Sarah...
If you are interested in visiting us and learning about these and other skills then send an E mail to...
firststeps@thewood.eclipse.co.uk

ENJOY....


Saturday, 7 August 2010

The New Office...

I recently decided to re-locate Spoon carving central office. The hovel used to be located next to the vegetable plot, under the Maple tree. It was getting a little cramped there, so I have re-built the office in the bottom field. I started out by making a frame work with some fairly substantial pieces of Hazel...

shelter building+spoon carving

shelter building+spoon carving

I didn't use any cord, I made use of the forks I left at the ends and intertwined them...

shelter building+spoon carving

I laid smaller sticks vertically from ground to ridge, and then used flexible whips to weave and bind it all together...
This little chap 'Deilephila elpenor' gave me a helping hand...

shelter building+spoon carving

Once I was happy there was enough lattice work to hold the thatch in place, I set about cutting some of the long grass I keep in this field. I lay the thatch starting from the ground up...

shelter building+spoon carving


shelter building+spoon carving

I wanted to insulate myself from the cold ground, so I pegged a couple of long logs across the entrance...

shelter building+spoon carving


shelter building+spoon carving

And filled the resulting space with flexible sticks...

shelter building+spoon carving

And then covered the whole lot with Hay...

shelter building+spoon carving


shelter building+spoon carving

I dug a small circular fire pit in front of the Hovel, and invited some friends round for a Curry...

shelter building+spoon carving


shelter building+spoon carving

We had a great evening and the office is now open for Spoon carving business...

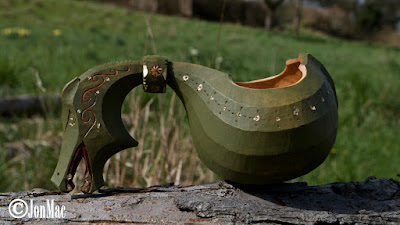
kuksa

Whilst undertaking this job I have also been busy making some treen to send up to the wilderness gathering. My work and others, including Custom knives by Chris Grant, will be shown on the woodlife. stand...

kuksa


kuksa


2kuksa"

Unfortunately I wont be attending due to other commitments. But I am sure Pablo at Woodlife will afford you all a warm welcome....J

Enjoy


Monday, 19 July 2010

Removing a chip from your treasured Axe ...

From time to time I get questions from people asking me "how to".
One such question was from a chap who asked how to go about removing a chip from his treasured G.B Axe.
On some Axes you can go about this job with a couple of good quality files, and finish up with a thorough sharpening on a stone. This would be the way to go about the job on my main firewood Axe. It is a 'No Name' and the head is quite soft.
I also own a Granfors Bruks, and  I know that the heads are quite hard. I would approach this job with a certain amount of care, slowly abrading the metal rather than filing.
Before you start this job it is worth making a note of the angle of the bevels at the cutting edge ...

axe carving

Try turning your stone on it's side, this way you wont damage the working face.
You will need to remove metal all along the cutting edge.
This way you will manage to keep the correct sweep of the cutting edge.
So starting at one end, move the head along the stone, lifting the helve as you go, presenting the whole cutting edge to the stone..

axe carving

And to the end...

axe carving

Repeat this until the you have a good clean radius...

axe carving


axe carving

With Princess Polly Poule looking on...

axe carving

As you will imagine, although this action will eventually render the cutting edge free from chips, you will now have to re grind the cutting edge...
Earlier you made note of the grind angle, it is now time to restore those angles....

axe carving

I would start with a course stone and then work toward a fine and finer finish.
The stone in this photo is a medium of around 800 grit...

axe carving

Steady the head with your left hand...
Keep a look out for a bow wave of water at the cutting edge. This wave will give you a clue to the correct angle of attack...

axe carving

Moving the head along the stone, presenting all of the cutting edge in a nice even motion...
Take your time, there is no need to hurry any of this work...

axe carving

Ten or so sweeps away from you, turn the head over and ten sweeps toward you. All these actions need to be counted, so both sides of the cutting edge receive the same attention...

axe carving

After this process and when you think the edge is somewhat restored, then make one sweep away and one toward...one sweep away and one toward....Do this about 10 times...

axe carving


axe carving

In this way the new bevel will be symmetrical...
Once you have achieved a good edge with the courser stones move onto the finest.
This final stone is around 6000 grit...

axe carving

Repeat all the previous actions..

axe carving

When you have achieved a keen edge, then it is worth giving the Axe a good strop on your leather belt...

axe carving

And start carving again...Enjoy.....J


Carving a Dragon Kuksa.

Carving a Dragon Kuksa.  I have been carving Kuksa from green Birch for 15 years or so, I’m self taught. From the beginning, I limited mysel...