Monday, 6 February 2012

Flint and steel...


 machris spoon carving knife spoon carving first steps

I've been busy.
Just as well I have been using  my new Adze as I was given a bit of a challenge from a friend of mine who is studying for her degree in archaeology.
A week or so ago she asked if I could help out with some living archaeology. 
Lucy had been tasked by Professor Bradley to knap a flint adze and use it to make a wooden object.

 spoon carving first steps

Well, as promised, Lucy arrived at my home last week with a Hassochs flint adze she had made at Exeter university. 
Lucy knapped a Bur flint adze head, wrapped it with a little piece of leather, and bound it, with raw hide, onto a piece of seasoned Silver Birch. 
The flint head is described as uni-facial, whereby small flakes are removed at an acute angle with a hard hammer stone to reveal a strong, sharp working edge.
Little is known about the type of work for which this tool was used, as nothing much remains in the historical record.


We decided to experiment by hollowing out a short split billet of Birch. Whilst we were adzing away we discussed what might have been made with a tool such as this. Items came to mind as we worked.
Vessels for processing food, mortar and pestle, perhaps Kuksa, all sorts of things were discussed.
Apparently this type of tool pre-dates flint axe heads. It occurred to me that you could still fell a reasonably sized tree, by chopping round the tree beaver style.

spoon carving first steps

Well I showed Lucy how to use the adze and set her on her way. With a lazy chopping action, being careful not to force the adze, it was surprising how efficient the flint was at removing waste wood. 


spoon carving first steps

The small curled shavings it removed were not as clean or as large as a modern metal adze would produce, but it was surprising how speedy the whole process was.

spoon carving first steps

We cut from each end of the billet into the middle, and then cleaned up the collected curls of wood and started over.


spoon carving first steps

We got a fair way into the bowl before I ran out of time for the day.

spoon carving first steps

Lucy has taken the bowl back to the university so she can finish the job.

spoon carving first steps

As you can see, the flint head is held on by a small pad of leather and a binding of pig raw hide.
We used the adze for two or three hours, I was quite surprised that the flint lost little of it's keen edge.

spoon carving first steps

Lucy also bought me a gift made by professor Bruce Bradley.

spoon carving first steps

It's a beautifully crafted adze head he knapped from a piece of green sand churt.
He has made it in the same style, uni-facial.
I will investigate as to what type of woods were available at the time these tools were in use, and select a good shaped helve onto which I can bind my flint head.
In the mean time I will carry on with my Gransfors Bruks gutter adze...

spoon carving adze spoon carving first steps

Once Lucy has finished her bowl I will ask her for some photographs for a future blog.
Enjoy...
J


Saturday, 21 January 2012

Rainy day char cloth.


spoon carving

Well.
First of all I would like to wish you all a happy and prosperous new year.
I've been spending my time since the festivities practising and adapting my spoon making techniques. I have been making Nordic style spoons and large serving spoons.
I wanted to increase my speed in manufacture, out of curiosity mainly.
I have been using my new Adze to great effect hollowing the bowls of the serving spoons in particular.
The Birch I was using was quite twisty and full of burs and knots, not at all suitable for highly finished treen.
So fun and experimentation has been the order of the day.
I'll write a tutorial on the Nordic spoons later in the month.

spoon carving adze

I had a visit from a friend of mine who is studying ancient cultures.
Lucy has recently returned from a dig out in Texas and is keen on carrying out some hands on experiments with stone tools.
Next week we will take a length of Birch, and using fire, shorten it to a length suitable for a long bowl, much like a sour dough bowl, long and shallow.
Her professor will make up some late stone age flint tools, an adze and blades.
With these tools we shall see what can be carved and how.
I am going to have to set a good fire on Monday morning.
I want to use a technique that I have not tried before.
Flint and steel...

Although this technique has nothing to do with the time period we are studying, it is a technique that I have not used before.
To coax a relatively cool spark from the steel into life, I will need something called char cloth.
I ripped my knee through my best (100%) cotton trousers last week, so I have an abundance of suitable material to make plenty of charred cloth.

The weather is pretty grim at the moment, so instead of using a conventional fire out doors, I decided to process the cotton in the firebox of my old range.
I needed a tin, with a removable press lid.

bushcraft knife char cloth

Sarah has been baking cakes so a syrup tin became available.
You can see the light coloured cloth under the lid.
I popped a small hole in the lid and carved a stick that plugged the hole...

machris bushcraft knife

I took the stick out and kept it handy for the latter part of the process.
I then rolled the cloth up and popped it in the tin.

machris bushcraft knife

I put the lid on nice and tight and made sure there was a pair of pliers handy to remove the hot tin from the fire later...

making char cloth

I put the tin in the hot embers.
Very soon smoke poured out of the small hole...

making char cloth

Increasing....

making char cloth

And then dying away and finally stopping.
Once the smoke had stopped I removed the tin with the pliers and sealed the hole with the wooden plug...


I let the tin cool.
Then removed the lid....
Char cloth.

char cloth


char cloth

So, a quick rummage in my bits and pieces draw resulted in a steel, a piece of flint and some Daldinia concentrica...

char cloth

I placed a small piece of char cloth on top of the flint and started striking it with the steel, producing small clusters of spark...

char cloth flint and steel


char cloth flint and steel


char cloth flint and steel

After a few strikes the char cloth started to glow, it had caught a spark.

char cloth flint and steel

I put the glowing cloth onto the fungi and nurtured the ember...

char cloth flint and steel

The fungi easily took the small char cloth ember and started smouldering much like charcoal...

char cloth flint and steel

Come Monday I will ignite some char cloth, pop it into a piece of  Daldinia concentrica and add it to a tinder bundle with which I can light my fire.

char cloth cramp ball

I'll keep you posted on how we get on with the experimental archaeology...
I must take the opportunity to thank Chris Grant for making the 'J' shaped steel striker and my MaChris knives.
Enjoy...
Jx


Sunday, 1 January 2012

Tuesday, 13 December 2011

Spoon carvers Khomus harp...

Well...
There it is...
I've reached the grand old age of 50.
Really not so bad as I've found out.
Sarah and I gave a small bash here at home where my oldest and closest friends joined together and ate a splendid lamb Balti, cooked by Richard and Tas.

jon mac spoon carving first steps

My good friends and family all chipped in and bought me a new edge tool.
An Adze from G.Bruks.
Sweden.

jon mac spoon carving first steps

Now I can hollow out my larger bowls and Ale hens a little quicker than when using the hook knife.

spoon carving first steps

Thank you all so much....

Sarah had been busy with other secrets as well.
She had spent the summer trawling around trying to find a Khomus mouth harp.
She finally tracked one down at Hobgoblin London.
It was a complete surprise when I opened the small parcel on the morning of my birthday.

khomus jews harp spoon carving first steps

This delicate instrument came without a case.
So I decided to make one for it as soon as I could...

khomus kuksa spoon carving first steps

Well... It did the job...

khomus jews harp spoon carving first steps

But Dolly and Choti thought I could make a better one.

spoon carving first steps

So I squared of another piece of Birch with my Axe and started afresh.
The first one was made with a knife and hook knife to start with... I'm afraid to say that because of the small size of the box I decided that I would have to employ another small tool.

spoon carving first steps

A tiny relief carvers gauge.
You can make it out in the centre of the picture.
As you know, I usually limit myself to three simple tools.
Axe, Knife and hook knife.
But on this occasion I had no choice as the dimensions of the box were dictated by the dimensions of the Khomus.

spoon carving first steps

Well here it is...

khomus jews harp spoon carving first steps

I can pop the cord around my neck and wear it as a pendant for safe keeping.
It has a camel bone bead on the back to keep the cord tight.

khomus jews harp spoon carving first steps

And I managed to hide the cord holes underneath the harp...

khomus jews harp spoon carving first steps

Here is a movie of me playing my super Khomus harp


I have played a mouth harp for about forty years.
But not one of such quality.
I will keep practising.
And enjoy the unique sound that these instruments produce.
Happy days.

Enjoy...

J


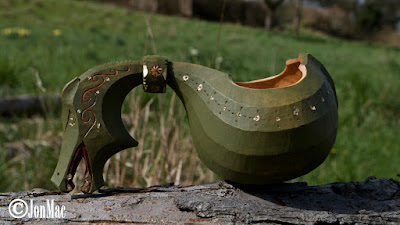
Carving a Dragon Kuksa.

Carving a Dragon Kuksa.  I have been carving Kuksa from green Birch for 15 years or so, I’m self taught. From the beginning, I limited mysel...