 Jon has had a great deal of interest in his beautiful hand carved Kuksas.
Many people are fascinated to see how he carves them and to learn that it takes two days to carve one.

So, picture yourself in our conservatory, with Jon being visited every now and then by our chickens!
 First of all he selects the piece of wood he wants to use. This is some Silver Birch which is his favourite wood to use for a Kuksa.
 Then he carefully centres up the wood and splits it. He wants to use the natural lines and markings in the wood to create each unique Kuksa.
 Having drawn a circle in pencil he then starts removing the waste wood.
 He keeps the shape he wants in mind as he carefully keeps on removing the waste wood.
 He keeps on carefully removing the waste wood...
 .. all the time improving the shape...
 ... until after some hours of careful work...
 ... he is ready to begin to hollow out the bowl of the Kuksa.
Using his hook knife he starts at the outside edge and works towards the centre across the grain.
 He carefully works to hollow out the bowl of the Kuksa.
 Until it nears completion.
This Kuksa needed a flat base.
Jon uses an old knife to scrape the wood smooth.
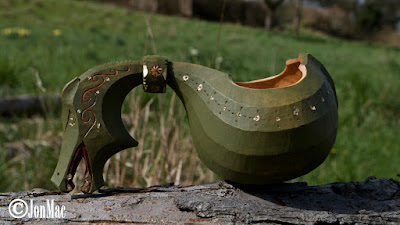
 Finally Jon finishes it with Walnut oil, which brings out all the details of the grain, and breathes even more life into the Kuksa.
Then it is ready to be used and enjoyed.


just been looking at your kuksa pictures,i have just set up what i hope will be the worlds largest repository of kuksa designs would you consider adding your pic?IT WOULD BE GREAT FREE ADVERTISING FOR YOUR SITE.
ReplyDeletehttp://www.flickr.com/groups/1565793@N22/pool/
regards,
fish.
Sure...Will do...J
ReplyDeleteThanks for the Instructions Jon, Well Done!
ReplyDeleteMy pleasure John...Anything I can help you with just let me know...J
ReplyDelete