Tuesday, 13 July 2010

Spoon Carving...

It is an exciting time for me at the moment.
I am presently working with Christopher Grant on a design for a very usable and quick carving knife. He is a very well known Bladesmith who lives in a beautiful part of  West Scotland. He will have a prototype made up shortly and as soon as I can I will post some photographs. In the mean time it occurred to me that I haven't written about how to make a simple spoon...
The weather here has been wonderful these last few weeks and I have spent lots of time under the Golden Ash carving out some spoons for our next show.
I also thought it was high time I made a spoon for Sarah.
She sees so many spoons leaving for other homes that sometimes she fells a little left out...
Start off  by finding yourself a piece of green wood wide enough, plus a bit, that will accommodate the size of spoon you have in mind. Try and find a piece of Birch or Sycamore to start with as these woods lend themselves to spoon carving.

I salvaged a piece of Birch I had forgotten about in the garage and split a good sized billet from it, making sure before I began that the wood was sound, without any signs of splitting....

spoon carving


spoon maker

The first thing to do is remove the bark, then roughly shape out the top face of the spoon with your sharp Axe...

spoon carving+devon

Make it straight it you wish or make it s little more feminine with a nice sweep...
Chop in the shoulders of the bowl. These cuts will also act as stop cuts when you start to reveal the handle sides...

spoon carving

Once you have the shoulders cut in, remove the waste wood along the handle with either feather cuts or simply split the wood away...

spoon maker

Here's what should be left...

how to make a spoon

The next thing to do is carefully cut in a tilt to the bowl...

how to carve a spoon

And you will produce something  like this...

carve a wooden spoon

Chop out the underside of the handle, keeping a nice sweep...

spoon maker

And finally chop out the underside of the bowl...

spoon carving

From this blank you can start with your carving knife. Carefully removing all that isn't needed.
Probably time for a coffee at this stage...

spoon carving

I like to make my spoons as flowing as possible. Although this is harder and takes longer to achieve, I find the end result very pleasing...

spoon maker

The final shape is beginning to appear...

spoon maker

You will now have to pay some attention to cutting out the bowl using your spoon knife...

spoon carver

Cutting across the grain...

spoon carving


spoon making south west

Now is the time to make another pot of coffee and start some old fashioned scraping until the spoon is smoother, ready for a little glass paper...

spoon carving south west

Scrape, drink and eat...

spoon carving

Until...

spoon making

Henny Penny, the wonderchicken says your work is done...

spoon carving south west

Oh and not forgetting Floppity Flo...

spoon carving
I am sure Sarah will love her new spoon.
I am taking details for courses over the summer for small groups, drop me a line at...
firststeps@thewood.eclipse.co.uk

Any questions then feel free to post a comment or even E mail me...


Enjoy...


Monday, 5 July 2010

Re helve/Re handle an axe.

Some time ago my friend Gerald bought round some Ash for me to use to re-handle some of my tools. I split it up and left it in the Apple Room to dry out...

spoon carving

One of the tools that has been languishing in a draw is a rather fine Japanese laminated Axe head. So this weekend I decided that the Ash was seasoned enough for me to set about the job of making a new helve for it. The first thing to do was select a nice piece for the job. One of the billets had a knot about a third of the way up, so I decided to use this piece as I didn't need a full length and I could cut out the knotty piece...

spoon carving

As with all this work it is best not to rush anything. Have a picture in your mind of the finished job...


spoon carving

With my Axe I gently start removing the waste wood. I am looking for an elliptical shape down the length of the billet...

spoon carving

Of course the chickeny helpers are always near...

spoon carving

Because of the unusual set of this particular head I make the helve into an "S" shape so I can fit my hand tight up and under the beard of the Axe...

spoon carving

When I am close to the desired shape, I start to use my carving knife to get things flowing...

spoon carving

I carefully shape the part that will slip through the Eye of the Axe. This needs to be an interference fit. I will tap the head on as far as it will go, and then remove it again. As you can see, this leaves a mark on the wood that I can use as a template. I will keep doing this until I have enough wood through the Eye....

spoon carving

Knock the head on...

spoon carving

And take it off again...

spoon carving

As you do this you will get a feel for the helve as you handle it more. With the knife remove more waste and add shape...

spoon carving

When the head fits the helve, I will add the final carving touches and then scrape down the helve with a small knife blade. I usually use a little Opinel, which I sharpen up on a medium diamond stone. A friend bought a set for me from a local builders merchant, very cheep, very useful...

spoon carving

With this technique I can get a very good finish that will need minimal sanding...
The next thing to do is cut in a slot for the wedge that will affix the helve to the head...

spoon carving

Cut down until the slot nearly reaches the bottom of the depth of the Eye...

spoon carving

Next I will fashion a wedge making sure to mark the depth to which the wedge will fit into the slot. This will help me to know when I have reached the fullest depth as I am pressing the wedge home...

spoon carving

First I split a small billet down to size, then fashion the wedge shape...

spoon carving

spoon carving

And mark up...

spoon carving

spoon carving

spoon carving

I will present the wedge to the slot one final time just to make sure all will fit nicely together...

spoon carving

Next step is to gently press the head onto the helve. This time it will be easier because of the recently cut slot...

spoon carving

I will place the wedge into the slot and you can either employ a lump hammer, carefully tapping the wedge in, or in my case I employed a sash clamp and carefully pressed the whole assembly home...

spoon carving

spoon carving

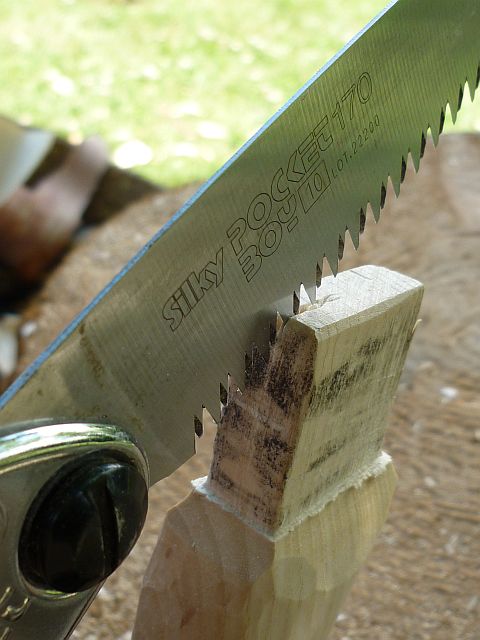
When the wedge is at its maximum depth I remove the excess with a saw and tidy up with a knife...

spoon carving

spoon carving

All nicely done...

spoon carving

A bit of a sharpen and away we go with some more spoons...
With Dolly the chickens help, I couldn't go wrong...

spoon carving


ENJOY...


See what else we get up to at... http://hennockhouse.blogspot.com/


Saturday, 3 July 2010

Sally's New Spoon...

I have just spent a little time making a serving spoon for my friend Sally....
I hope she likes it...


The other spoons in the basket are recent work and have not found homes yet...
I am sure it wont take long...


Over the weekend I will ask Sarah to help with some photography...I would like to show some of the carving techniques I employ...


Enjoy...J

Tuesday, 22 June 2010

The Topshan Art Show....

The Ideford Art Group has just completed a splendid weekend show at Topsham...

kuksa+spoon

We were supported by many visitors who all showed a great interest in our work, and this has encouraged us to continue with our idea of showing our Art in as many easily accessible places as possible in the South West of England...
Here we have just finished setting up on the Friday night...

jon mac+art

Here Jan Lunn explains some of her techniques to one of our guests...

jon mac+art


jon mac+ideford+hennock

And some great work by Oliver Lucas

jon mac+ideford+hennock

Oliver Lucas

I spent a few days making some rustic spoons and whistles to add to my display...

jon mac+ideford+hennock

I must admit I gave away most of the whistles to passing children...And a couple of adults...lol

jon mac+hennock+ideford

Paul and Olly discussing the best way of enticing the passing potential viewers...

jon mac+art+ideford+hennock


jon mac+ideford+hennock


jon mac+hennock+ideford

And some super glass work by

jon mac+ideford+hennock

All in all we had a great time and we were greatly encouraged by the wonderful people who came to visit...

Thank you Topsham...


ENJOY...


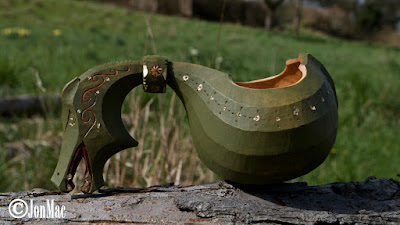
Carving a Dragon Kuksa.

Carving a Dragon Kuksa.  I have been carving Kuksa from green Birch for 15 years or so, I’m self taught. From the beginning, I limited mysel...