Wednesday, 11 July 2012

Spoon carving hook knife handle fitting.


spoon carving

Last week I received a package in the post.
I opened it up and found a beautiful hooked finishing knife made by 
Nic has been traditionally forging contemporary ironwork pieces from his workshop in mid Wales since 1997.
His catalogue of edge tools will make any green wood carvers pulse race.
Nic manufactures all one needs for the job of spoon carving.
All of his edge tools are extremely well designed and very well priced.
Nic sells his edge tools mainly without handles.
This gives the customer the freedom to experiment with a handle type of their choice.
Believe me, it's great fun experimenting with ergonomic handle shapes, and carving your own gives a freedom of expression. Carving your own may also save you from blisters and sore hands.
I had a rummage in the garage and came out with a Birch bur that my good friend and fellow spoonmaker Alan Robinson gave me some months ago.
I cut it open and found that it wasn't a birds eye type bur, but more like a curly Birch bur.
It had to be done. I knew straight away that the handle would look great once oiled.
I roughly carved the handle and drilled a hole for the blades tang.
 I popped a pilot hole in first, and then followed up with a larger bit.
I finished the hole with a bit the same width as the tang at it's widest.

spoon carving knife

I cleaned out the hole and set about carving a couple of  pegs to hold the tang in place.
You can set a blade in a handle without this step, but personally I think it looks messy.
The pegs I carved came from a block of Pitch Pine.
This Pitch Pine came from the famous tea clipper...

spoon carving knife

It takes a while to get the pegs just so.
Not too tight for fear of splitting the handle.
You can leave them long.
They will get trimmed when the epoxy resin has set.

spoon carving knife

I used Araldite, as this is what I found in the draw.
There are other types available that are apparently tougher.
The tang needed a little attention with some abrasive paper, I also cleaned it off with some meths to remove any oil.


spoon carving knife

I wrapped a little packing tape around the handle to keep the glue from marking the wood.


I mixed the two part epoxy, and with a piece of wood, scooped the glue into the socket.
Fitted the blade.
Carefully slid the pegs in.
And made sure everything was ship shape.


Once the epoxy had set, I carefully trimmed the excess pegs and cleaned up the handle.


The finished knife.

spoon carving knife

I have run the knife through a few pieces of plum.
My first impressions are, why didn't I get in touch with Nic sooner...?

spoon carving knife

Nic's finishing blade is forged from silver steel.
I have over the last couple of years tested all manor of steel types.
Silver steel is one of my top two favourite steels, easy to sharpen, allied with superior edge retention, even in the hardest of wood.  
The blade is heat treated so it has a hard cutting edge and is reinforced by a softer tougher spine.
This blade is not laminated but differentially hardened.
Nic makes all his blades this way.
This blade is forged to a curved cross section, giving it a concave inside face.
The bevel is flat at the cutting edge, for ease of sharpening, and convex toward the spine, which is naturally slightly curved during the forging process.
The convex profile will reduce any chatter in tighter radii cuts.
Hopefully I will only need to strop the blade to maintain a good cutting edge in the short term.


I think my old Mora/Frost hook knife can be safely retired.
Nic's knives a very well priced for a hand made product. 
I would highly recommend anyone looking for a carving edge tool to get in touch with him, as his tools will far out perform any of the factory mass produced products on the market.
And you'll be buying a well designed and manufactured British product.
He has a super web page at...


spoon carving knife

Enjoy...


Monday, 25 June 2012

Spoon carving and Kuksa in the making....


I took some photographs of two spoons I recently carved over the weekend and thought I might post them up on a new blog run by my friend Sean Hellman.

Spoon carving

Spoon carving

Spoon carving

Spoon carving

I gave it some thought but decided I would be cheating if I did.
Sean is a woodworker - designer with a passion for trees and photography. His business, Woodwright Designs, is based in the old stannery town of Ashburton, nestling in the foothills of Dartmoor. 
Sean has a blog called ...
He also has another interesting blog called ...
This is where I fell down on being able to post my spoons.
The wood I used didn't strictly come from the fire wood pile.

Here are the rules...


Rules for Pimp My Firewood.

The wood must be firewood either green or seasoned.
Size restrictions are 3 foot long, any diameter.
This wood must come from the firewood pile or be about to go into the firewood pile.
Any tools can be used : traditional hand tools including stone, electric or even computer controlled.
You must supply a photo of your log before you use it and a photo of the finished item.
Work in progress photos would be useful for anyone reading the blog, to understand and learn more about woodwork.
Please feel free to write about how you crafted the item or any related stories or points of interest.
Measurements of the log is to be supplied.

This challenge is open to anyone, beginner, professional, from any country.
You can make anything.

 To have your work included, email me at info@seanhellman.com , with photos and text.

Please include a few words about yourself  or your business.

This blog welcomes suggestions, articles and other wood related material.
We want to educate, entertain and inspire...


Go on folks... Go visit Sean's site, you'll find all the details needed to join in the fun.
Get your edge tools sharpened up and put that camera to work...


Enjoy...J;-)


Saturday, 5 May 2012

Eagle Kuksa...


Well, it was back to the chopping block last week.
Folk from near and far have ordered treen.
I was asked to make a Kuksa that is slightly different to my normal fair.
And I think it worked out fine.

Kuksa Jon Mac spoon carving first steps

He is carved from a piece of Sycamore gifted to me a few weeks ago.

Kuksa Jon Mac spoon carving first steps

And finished with a little Liberon Tung oil.

kuksa spoon carving first steps

The bowl is knife finished inside and out.
Whilst the head is sanded.
I have weaned myself away from abrasives on the whole, but sometimes a good smooth finish is desirable.
I keep a stash of Abranet in the draw for just these occasions.
I have also made a spoon for my good friend Magali, who is a superbly talented maker of the traditional French Laguiole knives.

spoon carving spoon carving first steps

Again, the bowl is knife finished and the handle has been sanded.

spoon carving spoon carving first steps

Hopefully I'll be receiving a parcel from Scotland soon.
I'll let you know what it is when it arrives.
Until then....
Enjoy.
J.


Sunday, 29 April 2012

Pimp my poncho liner...


spoon carving first steps MaChris bushcraft knife

Here's a job I've been meaning to carry out for quite a while now.
I wanted to put a hole in the middle of my poncho liner so I could actually wear it under a poncho.
For me, cutting holes in things takes a little contemplation...
So after three years of thinking about it I decided to take the plunge.

spoon carving first steps

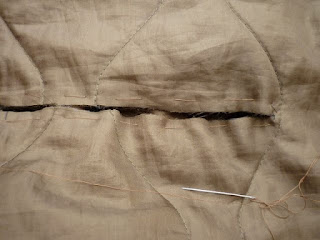
So first thing I did was find the center of my proposed slot, folding the liner in half and then marking the center with a marker.

spoon carving first steps

A 14 inch slot would suffice.
Marked up and ready for the scissors...

spoon carving first steps

Here we go then...
I take the plunge and snip the slot with some sharp scissors.


Some big old ' Homeward bounders ' will keep the three layers of material together whilst I work .

spoon carving first steps

Next I cut some tape that I could stitch over the cut edges.

spoon carving first steps

Folded in half along it's length and tacked on.

spoon carving first steps


spoon carving first steps

The next decision was whether to sew by hand.... Ooooor....Get the machine out.

spoon carving first steps

I wanted to get the job done fast so I went for the machine.
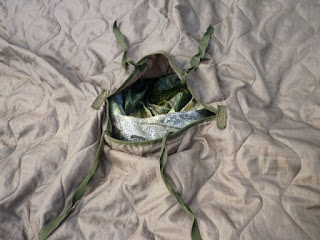
Here the tape is stitched on and I have added two short lengths of tape at each end to give some strength.

spoon carving first steps

Plus four longer lengths of tape with which I can close the slot when using the liner as a blanket or sleeping bag.

spoon carving first steps


spoon carving first steps

Here's the liner tied into a U.S Army lightweight poncho.

spoon carving first steps

And our wonderful model sporting the new spring look poncho...

spoon carving first steps


spoon carving first steps

I have always favoured kit that can be employed in more ways than one.
My new improved liner can now join some of my favourite equipment.
I guess the next job is to run a long zip around an end and two sides so I can make a nice snug sleeping bag.
Perhaps some other time...
Enjoy...
J


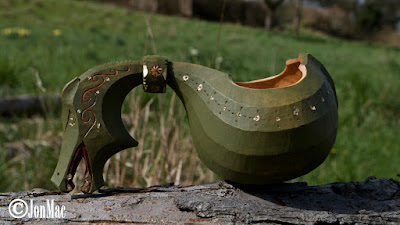
Carving a Dragon Kuksa.

Carving a Dragon Kuksa.  I have been carving Kuksa from green Birch for 15 years or so, I’m self taught. From the beginning, I limited mysel...